"Fashion is Architecture. It is a matter of proportions"
~Coco Chanel~
Happy Friday Lovelies! I hope you all had a wonderfully productive week and you're ready for a fabulous weekend. I've been so busy this week with work, sewing and preparing for my vacation (cruise) next week that I almost forgot to prepare my post for today. I’m not really sure where this sudden burst of energy is coming from this morning considering I was up until 2:00am sewing with little regard for the fact that I had to be up and ready to go by 6:00am.
Oh well I guess you can chock it up to me being a mom, thus I’m trained to keep things moving and be fabulous with very little sleep! LOL Last night I had the bright idea to try and sew five pieces (three almost completed on Wednesday and two started last night) in preparing for next week's blog posts. I have so much to do before my “Girls Only” cruise that I wanted get as much sewing done as I possibly could in preparing for my photos shoot this Saturday.
Not to mention the fact that I have back to back meetings this weekend leaving me very little time to get any sewing done before Monday’s blog post. Anyhoo I made it through my self imposed sewathon unscathed and I have to tell you I’m feeling really accomplished right now. I think you’re going to enjoy my fabric as I decided to cut into the fabulous blue crocodile print I blogged about last week. Of course I threw in a couple of black knit pieces to tone it down a little because to much of a good thing can border on TACKY if you’re not careful!
Needless to say all is well and I can’t wait to take pictures so I can share what I’ve done with all of you. As for today I decided to share one of my favorite quick skirt drafting methods that I learned years ago and found again a fabulous book I purchased for my daughter a couple of years ago. Whenever I need to draft a basic skirt really quickly I always refer to this method especially when I want to add design elements that aren’t readily available via commercial print patterns. This method is perfect for beginners and visual learners as it walks you through the process step by step with pictures to match. I used the straight skirt method to draft the black skirt I made for next weeks post and when I tell you it’s super simple it really is just that!!
I hope you find this information useful and please feel free to contact me via email at mydailythreadzme1@gmail.com if you have any questions regarding the instructions (although I doubt you will). Here’s to a great weekend Lovelies! MUAH!
Hugs
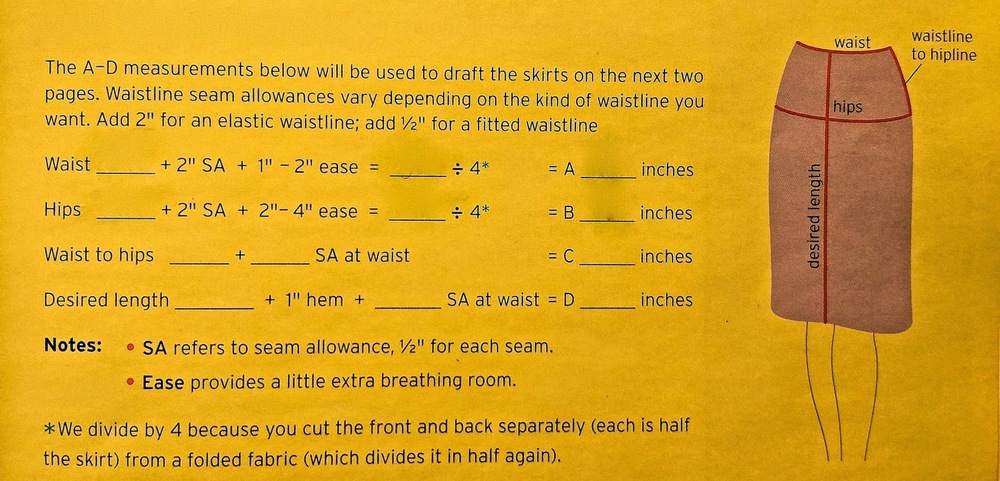
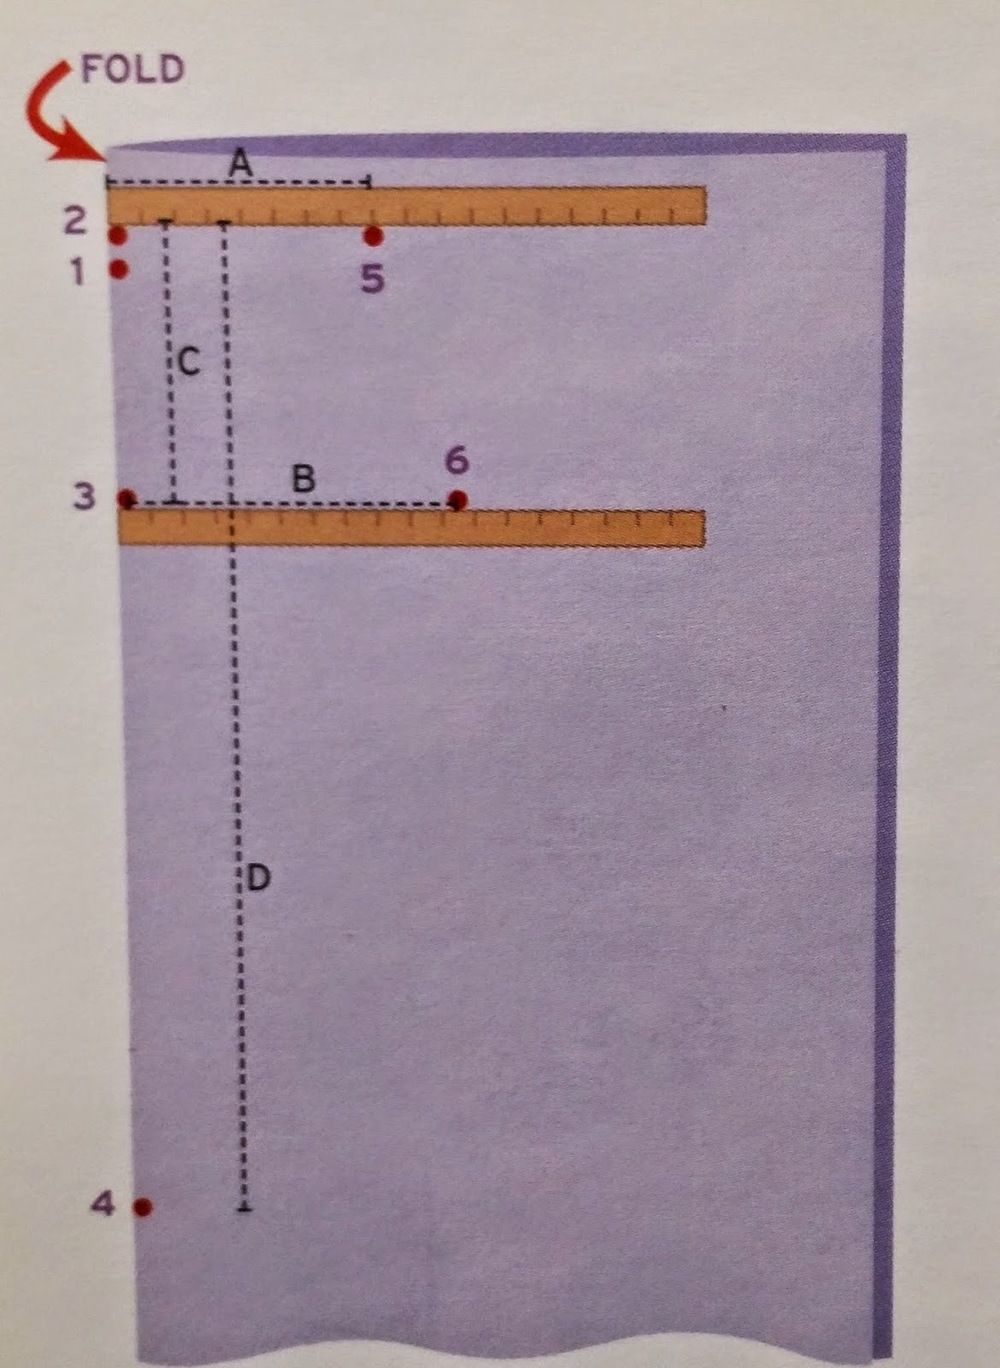
Straight Skirt, Fitted Waist Draw your markings on pattern paper or directly on fabric whichever you choose First Take your Measurements See Last Chart Below in Yellow Now Follow these steps making marks as shown on picture below
.1. Near the top, mark a dot for the waistline.
2.Mark ½” to 1” above the first mark (to plot waistline curve).
.3. Mark the distance from waist to hip (measurement C)
4. Mark the desired length (Measurement D)
For the Side Seam
5. From mark 2, place a ruler perpendicular to the fold and mard the waist width (measurement A).
6. From mark 3, place a ruler perpendicular to the fold and mark the hip width (Measurement B)
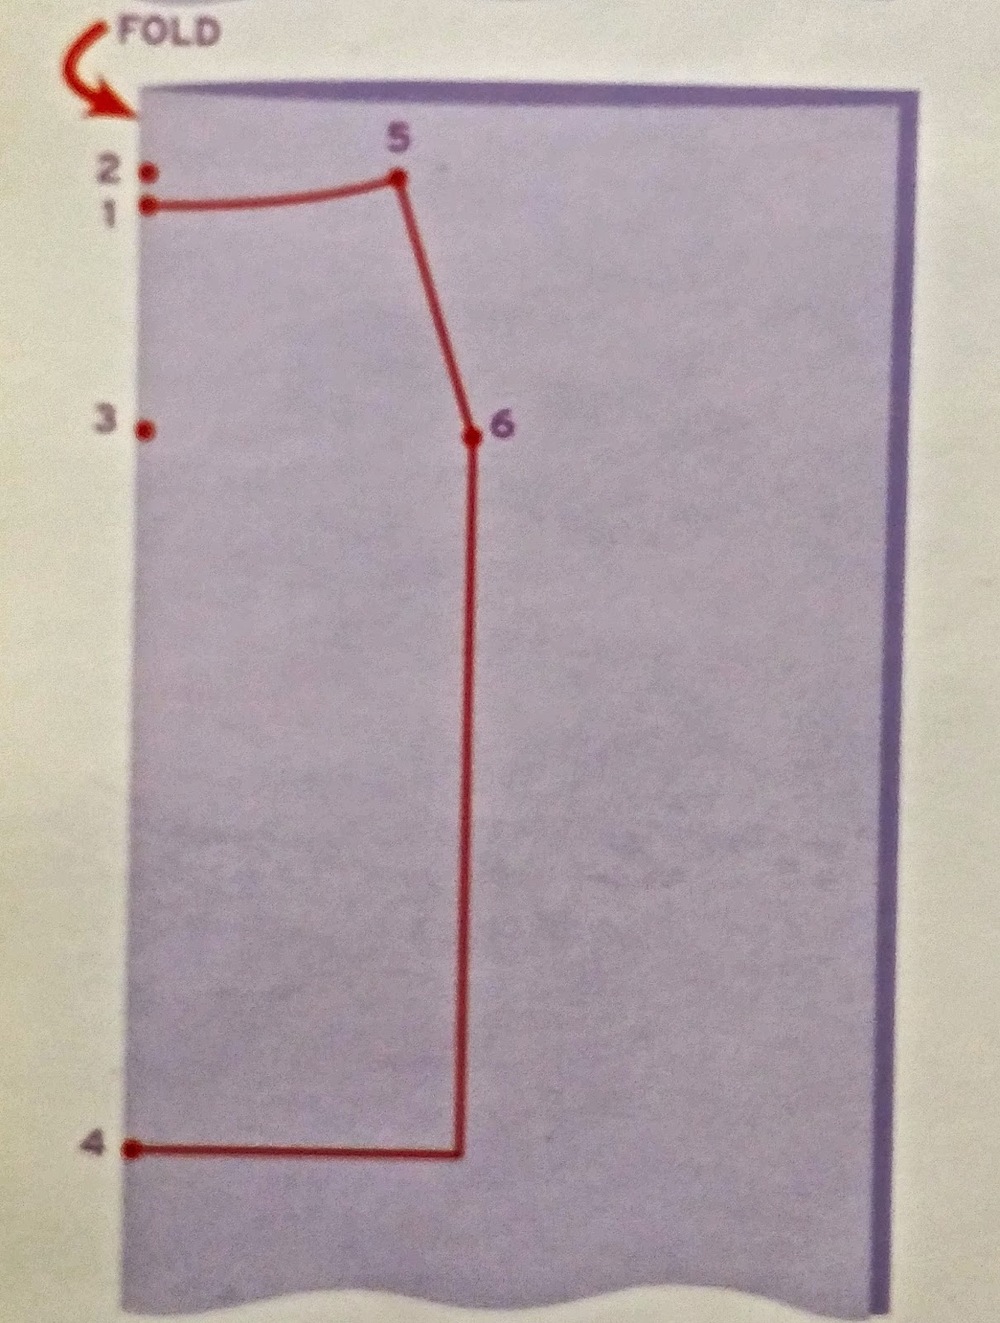
Time to Connect the Dots
Follow steps just like the picture below
1.Waist: Draw a curved line from 1-5
2.Hemline: Place a ruler perpendicular to the fold at 4 and draw a line that extends to where the seam line will be. This is an approximation; you can adjust it later.
3. Side Seam: Draw a straight line from 5-6
4. Side Seam: Draw a line parallel to the fold and selvage from six to the approximate hemline (the hemline based on length you want).
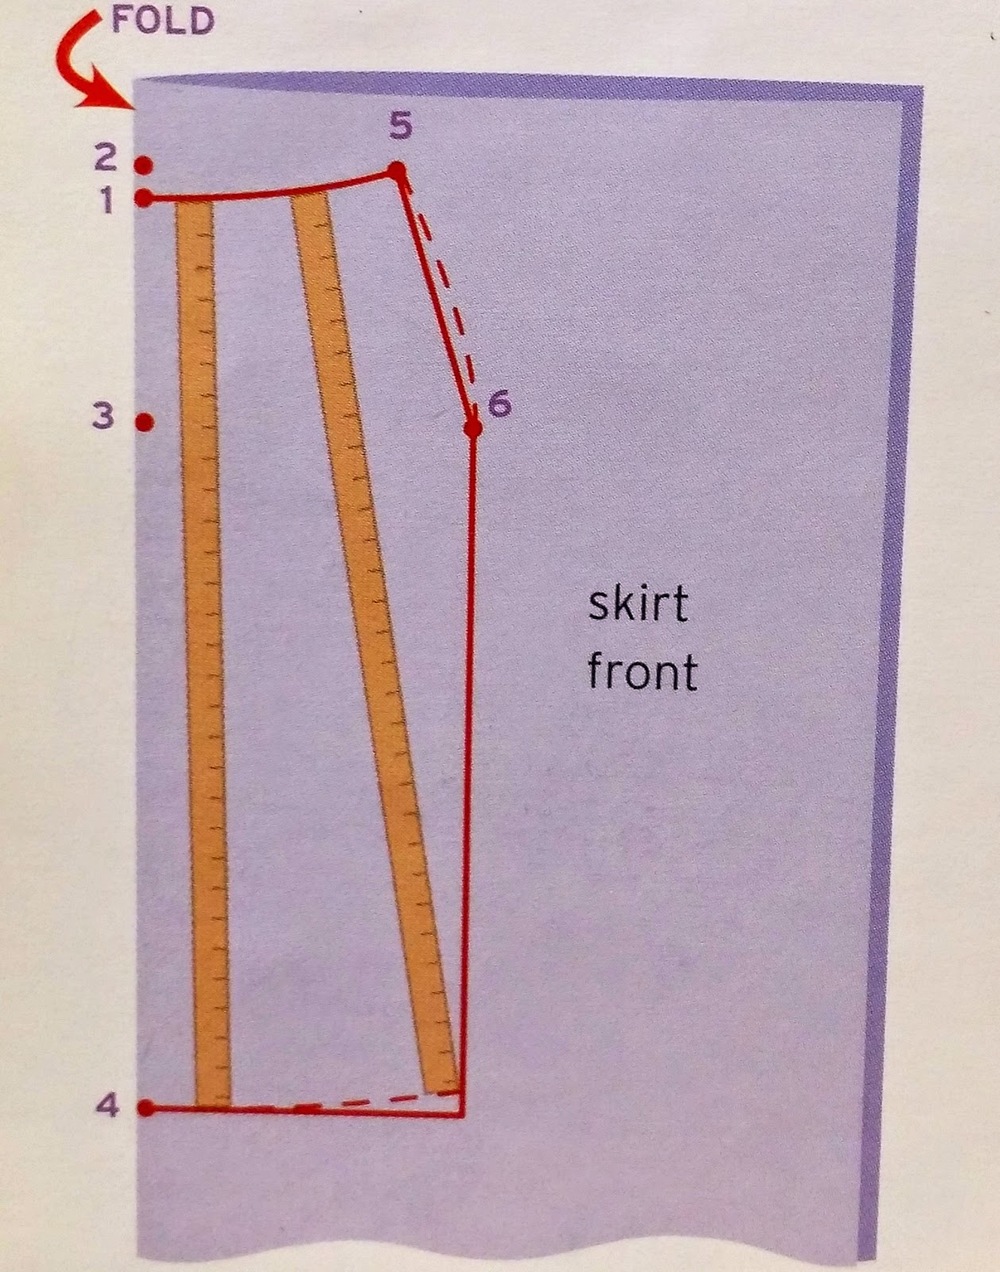
Finishing up
1. Draw a curved line to smooth out the corner at mark 6.
2. Use your yardstick to check that the distance from the waist to the hemline is consistent. (as seen in picture below)
Cut it out
For a side zipper: cut two identical pieces for front and back!
For a Back Zipper: Position the first piece 1/2" from the fold line or selvages to allow for seam allowance in the back. Then cut two back halves all based off of the pattern you just made.
Planning Ahead
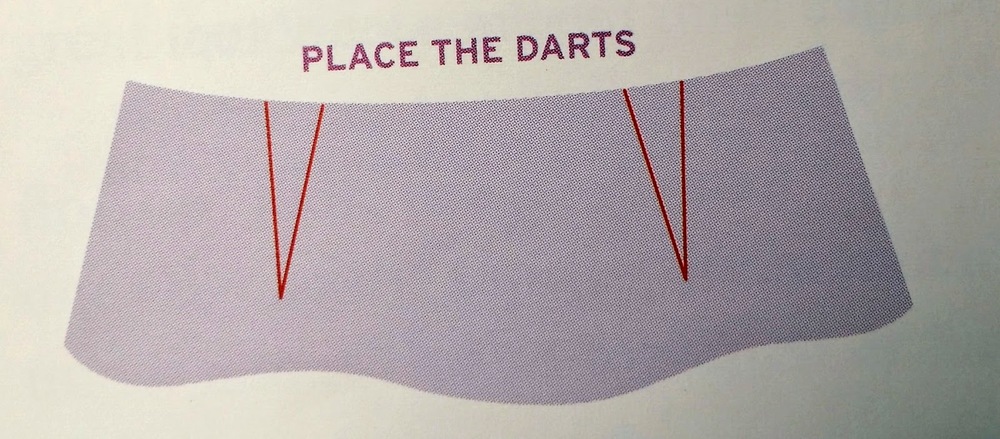
For mor curvy Ladies who have fabulous hips and may need to add darts here ya go!
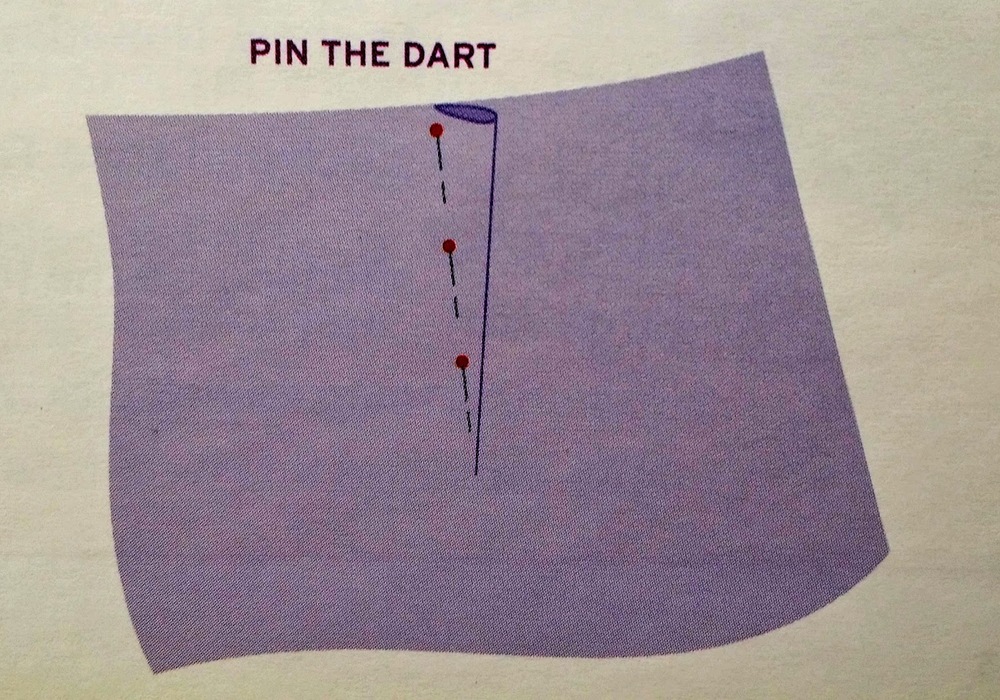
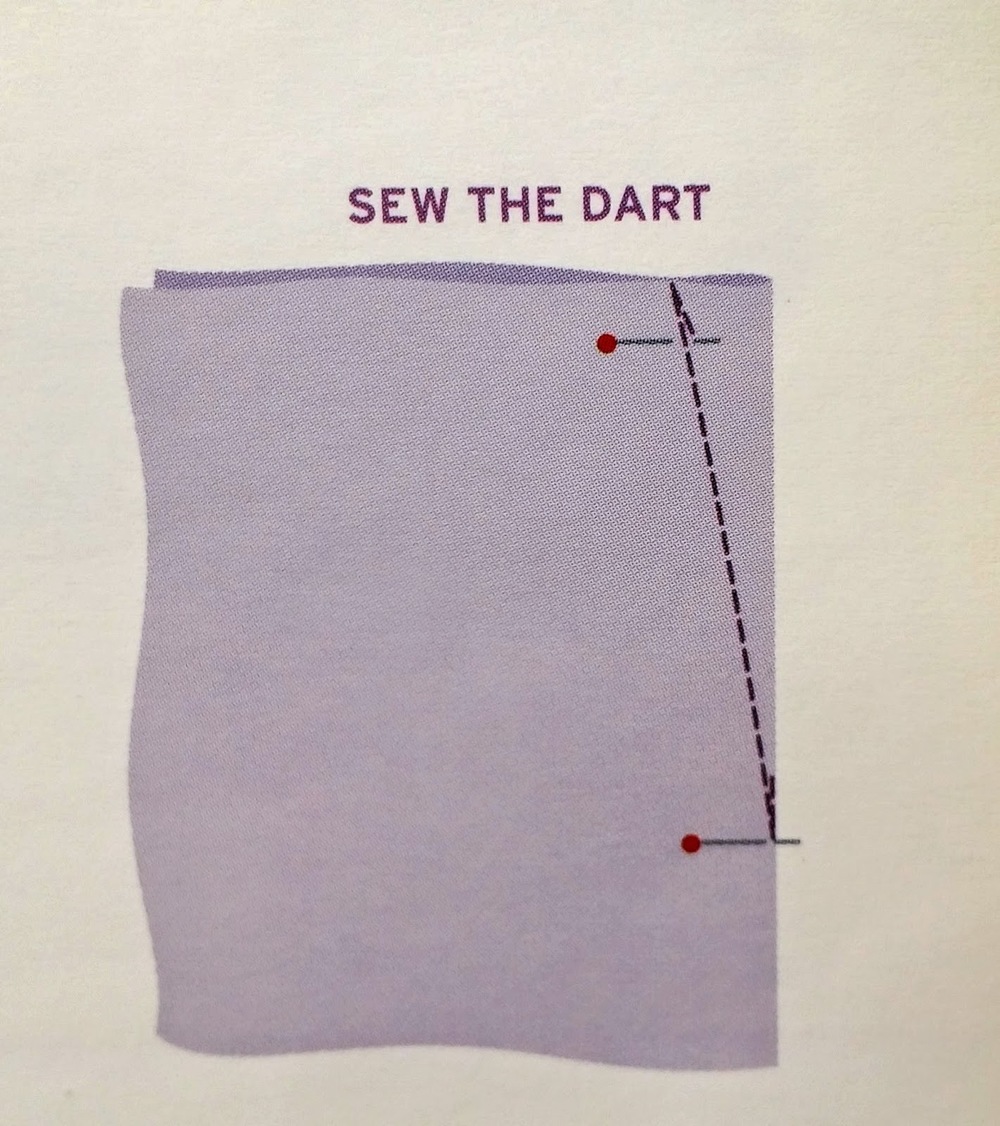
If you have the kind of curvy figure that requires darts to might want to plan for them at the beginning. When calculating your waistline measurement, add another 2 inches or more. The curvier you are the more you may have to add. The point is to allow enough fabric to work with, so you can make the darts. Plus if you know where to put your darts it is easier to stitch them in before you do the side seams. Once you try on the skirt you will see exactly where you need to cinch in at the waist to form your darts. Evenly distribute the extra fabric in the waist to both sides of the back pieces of skirt creating your darts like so:
Making your own Waistband
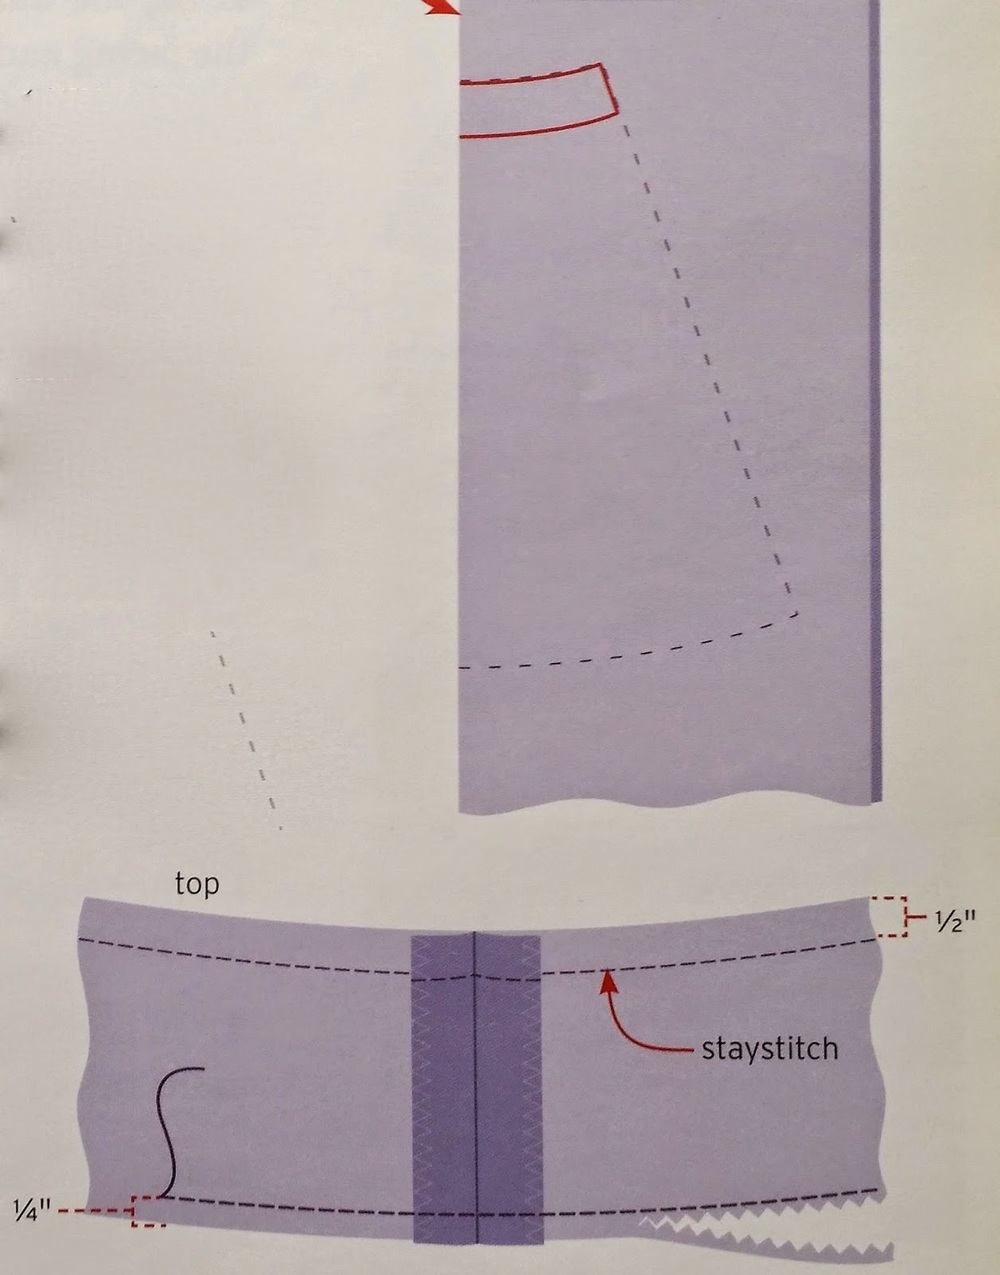
To make your own Waistband, cut a piece of fabric on the straight grain of the fabric the length of your waist plus 1"(for two seam allowances) and another inch or so for ease. The height of the waistband is whatever you want it to be time 2 (because you fold it over), plus 1" for seam allowance.
Making your own facing!
If you put a zipper in your skirt and don't want a waistband, the solution is to make a facing. This flap of fabric neatly finishes the waistline edge, folds over to the inside and lies flat. To cut a facing for a skirt, use the skirt pattern pieces as a guide(see picture below). The facing should be about 3" wide and match the shape of the skirt. Cut two pieces for the front and the back. Keep in mind that the zipper opening of your skirt should be on the left side. The facing goes on after you have put in the zipper.
Remember ALWAYS add your seam allowance!
Taking your measurements Scale